Snacks
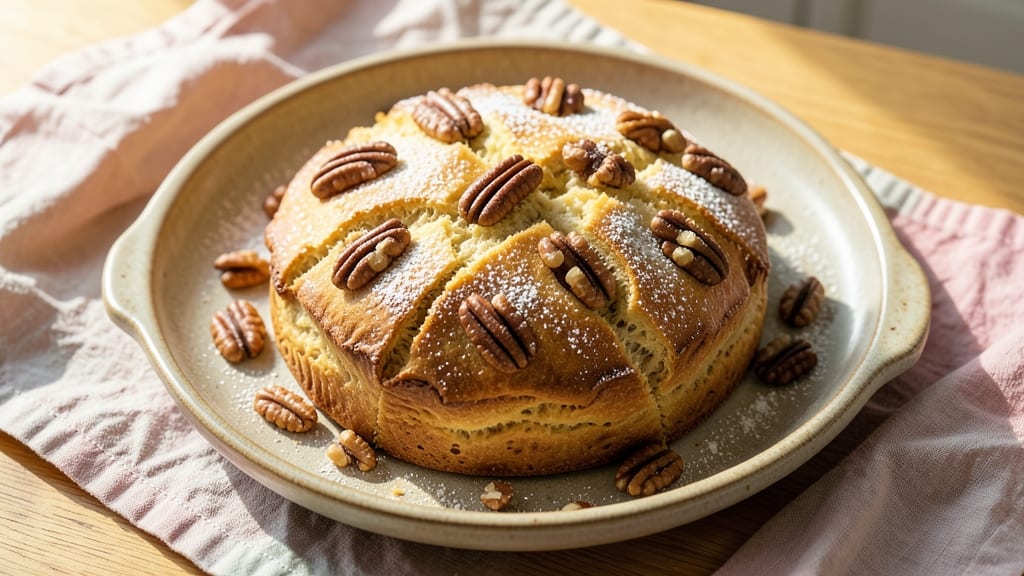
This old-fashioned nut roll recipe brings back the cozy, buttery layers and warm spice swirls that made Sunday mornings special in generations past. The secret lies in a tender, flaky dough rolled with a rich nut filling—just the right balance of sweetness and crunch.
I remember my grandmother’s kitchen always smelled like cinnamon and vanilla when she made these, and now I’m sharing her foolproof method with you.
The key to perfect nut rolls is patience—letting the dough rest and rolling it thin ensures those signature buttery layers that melt in your mouth. A simple nut filling of ground walnuts, sugar, and spices gets tucked inside before baking, creating a treat that’s both nostalgic and satisfying.
This recipe delivers restaurant-quality results with just a few simple ingredients and about an hour of hands-on time.
Once baked, the nut roll emerges with golden layers and a fragrant aroma that will have everyone gathering around. The filling stays gooey in the center while the dough stays tender, not dry.
Serve it warm with a dusting of powdered sugar or a drizzle of chocolate glaze for that extra touch of indulgence. It’s the perfect snack for any occasion—whether you’re hosting a brunch or simply craving a taste of home.
For those who love variations, you can swap the nut filling for cream cheese or add a hint of lemon zest to brighten the flavors. The beauty of this recipe is its versatility—it’s classic enough to feel traditional yet approachable enough for modern kitchens.
Let’s get started on creating your own piece of nostalgia.
Ingredients for old fashioned nut roll
Buttery dough, nutty filling, and warm spices—just six ingredients transform into nostalgic nut rolls.
| Ingredient | Amount | Notes |
|---|---|---|
| All-Purpose Flour 🌾 | 4 cups | Sifted for flaky layers |
| Unsalted Butter 🧈 | 1 cup | Cold, cubed for dough |
| Granulated Sugar 🍚 | ¼ cup | Plus 2 tbsp for dough |
| Large Eggs 🥚 | 2 whole | Room temperature |
| Ground Walnuts 🥜 | 1 ½ cups | Freshly ground preferred |
| Light Brown Sugar 🍚 | ½ cup | Packed, for filling |
| Ground Cinnamon 🌿 | 1 tbsp | Freshly ground for warmth |
| Vanilla Extract 🍯 | 1 tsp | Pure, not imitation |
| Salt 🧂 | ½ tsp | Fine sea salt |
| Powdered Sugar 🍚 | ¼ cup | For dusting, optional |
| Dark Chocolate Chips 🍫 | ½ cup | For optional drizzle |
| Lemon Zest 🍋 | 1 tsp | Brightens filling (optional) |
The butter is non-negotiable—European-style or Land O’Lakes work best, but avoid anything with additives. I always buy it in 1-pound blocks from the grocery store’s dairy case (not the tubs) and let it sit at room temp for a few hours before using. The flour should be all-purpose, not self-rising, and if you’ve got King Arthur or Bob’s Red Mill, even better. The walnuts? Freshly ground makes all the difference—pre-ground loses its crunch. Toast them lightly in a dry pan first for extra flavor. And don’t skip the vanilla—Nestlé Pure is my go-to, but any pure extract will do.
No ground walnuts? Pecans or hazelnuts work too—just toast and pulse them in a food processor. Short on butter? Vegetable shortening keeps the layers flaky, though it won’t taste as rich. The brown sugar in the filling can be swapped for white if you’re avoiding molasses notes, but I prefer the depth. For a modern twist, add 1 tsp lemon zest to the filling (like my grandmother did after moving to Florida). The powdered sugar is just for dusting—skip it if you’re drizzling with chocolate. And if you’re feeling fancy, swap half the walnuts for toasted coconut—trust me, it’s delicious.
This dough needs at least 1 hour of chilling between layers, so plan ahead. Wrap the rolled dough tightly in plastic and refrigerate—it’ll keep for 2 days before baking. The filling can be prepped a day ahead and stored in an airtight container. Once baked, these stay fresh for 3 days at room temp, wrapped in a towel. For longer storage, slice and freeze—2 months is no problem. Reheat slices in a 200°F oven for 5-10 minutes to restore that gooey center.
Why You'll Love This Recipe
- No-Fuss Dough: I swear by this—just mix, roll, fold. The butter gets worked into the flour like a dream, and the walnuts stay evenly distributed without extra fuss. Honestly, my first attempt was lumpy, but now I can make two batches while chatting with someone.
- Buttery-Walnut Magic: That first bite? Warm, tender layers with crunchy walnuts and a whisper of vanilla from the sugar. The butter doesn’t melt out, so every slice stays rich and cohesive—no sad, greasy pastry here.
- Breakfast or Dessert: Serve it toasted with jam for a weekend brunch, or drizzle with honey for a quick afternoon treat. My kids grab slices for school lunches (yes, even on a Tuesday), and it reheats beautifully in the toaster.
- Budget-Friendly Staples: Flour, butter, sugar, eggs—ingredients I already have. Walnuts stretch further than chopped nuts, and leftovers keep for days in the fridge. I’ve made this for holidays, potlucks, and lazy Sundays without breaking the bank.
Step-by-step instructions for old fashioned nut roll recipe
Here's how to create flaky layers and rich walnut filling that make this classic dessert unforgettable.
Prepare the Dough for Perfect Layers
In a large mixing bowl, combine the 4 cups all-purpose flour, 0.5 teaspoon salt, and 0.25 cup granulated sugar. Whisk gently to distribute evenly—this prevents dense spots in your final roll. Cut in the 1 cup cold cubed unsalted butter using a pastry cutter or your fingers until the mixture resembles coarse crumbs with pea-sized butter pieces remaining.
Add the 2 whole room-temperature eggs one at a time, mixing just until combined. The dough will be shaggy at first, but don't overwork it—you're aiming for a soft, pliable texture that holds together when pressed. Wrap the dough tightly in plastic wrap and refrigerate for 30 minutes to firm up before rolling. This chilling step prevents the butter from melting during handling and ensures those signature flaky layers.
Roll and Fill with Walnut Spice Mixture
Preheat your oven to 375°F while the dough chills. On a lightly floured surface, roll the dough into a 12x15-inch rectangle about ⅛-inch thick. I like to use a rolling pin with even pressure—don't press too hard or you'll compact the layers. Brush the entire surface lightly with melted butter, leaving a 1-inch border around the edges.
In a separate bowl, mix together the 1.5 cups ground walnuts, 0.5 cup packed light brown sugar, 1 tablespoon ground cinnamon, 1 teaspoon vanilla extract, and 1 teaspoon lemon zest (if using). Sprinkle this filling evenly over the buttered dough, leaving that same 1-inch border uncovered. The filling should look like a thin, even layer—this prevents overfilling that can cause spillage during rolling.
Roll and Bake to Golden Perfection
Starting from the long side, tightly roll the dough into a log, sealing the edge as you go. Place the roll seam-side down on a parchment-lined baking sheet. Brush the top with additional melted butter and sprinkle with the 0.25 cup powdered sugar for that classic dusting. Bake for 25-30 minutes until the top is golden brown and the internal temperature reaches 200°F—this ensures the center is fully baked without drying out.
Here's where patience pays off: let the nut roll cool on a wire rack for at least 15 minutes before slicing. The filling needs time to set slightly, and the layers will firm up properly. If you're using the 0.5 cup dark chocolate chips, melt them with a little cream and drizzle over the warm roll before serving for an elegant touch.
Slice and Serve Warm
Once cooled, slice the nut roll into 6 equal pieces using a sharp serrated knife. The layers should separate cleanly with minimal crumbling. Serve warm with a dusting of additional powdered sugar or a scoop of vanilla ice cream to balance the rich walnut filling. The contrast of warm spiced roll with cool ice cream makes every bite magical.
This recipe makes 6 generous servings—perfect for sharing with family or guests. The secret lies in the cold butter and proper chilling; don't rush these steps or you'll lose that signature flakiness. Store leftovers in an airtight container at room temperature for up to 3 days, though I doubt any will last that long!
Pro Tips For Making Old Fashioned Nut Roll
- Chill the Dough: After mixing, let the dough rest in the fridge for at least 30 minutes—no, you don’t have to wait all night. This prevents the walnuts from sinking to the bottom like a lead weight and gives the butter time to firm up, so your roll holds its shape when sliced.
- Toast the Nuts: Skip the pre-ground walnuts and toast your own whole walnuts in a dry pan over medium heat for 5–7 minutes until fragrant. Then pulse them in a food processor—this deepens their flavor and prevents them from turning bitter in the oven.
- Don’t Overmix: Once the flour is incorporated, stop mixing as soon as the dough comes together. Overworking it develops gluten, and that’s how you end up with a tough, chewy roll instead of a tender, crumbly one. Two minutes past the point of cohesion is plenty.
- Brush with Egg Wash: Whisk one egg with a splash of water (about 1 tablespoon) and brush it lightly over the rolled dough before slicing. This isn’t just for looks—it seals the edges so the nut filling stays put and the crust stays crisp, not gummy.
Make-ahead tips for leftovers
Dough Prep Ahead
Make the dough up to 2 days in advance and store it wrapped tightly in plastic wrap in the refrigerator. The cold butter will firm up again, making it easier to roll thinly later.
I like to label the wrapped dough with the date—this prevents any confusion when you're ready to assemble. The dough can also be frozen for up to 3 months by wrapping it in plastic and then aluminum foil for extra protection. Thaw overnight in the fridge before rolling. 🧈
Filling Prep
The nut filling can be made 1 day ahead and stored in an airtight container at room temperature. This gives the spices time to meld together, intensifying the flavors. If you're using fresh walnuts, toast and grind them right before mixing with the other ingredients for maximum freshness.
For a shortcut, I sometimes use pre-ground walnuts straight from the jar, but I always add a pinch of extra cinnamon to compensate for the lack of freshness. 🥜
Assembling the Roll
Roll out the dough and spread the filling the night before baking, then wrap it tightly in plastic and refrigerate. This overnight chill ensures the filling stays put during rolling and baking. I find this method prevents any filling from leaking out during the baking process.
When you're ready to bake, simply unwrap and proceed with the recipe as written—no need to thaw the dough. The cold start helps create those perfect flaky layers. ❄️
Baking in Batches
If you're making multiple nut rolls for a crowd, bake them one at a time to maintain oven temperature consistency. Preheat the oven between batches for 5 minutes to ensure even baking. I like to bake two nut rolls back-to-back, then let them cool completely before slicing.
This prevents the warm rolls from steaming and becoming soggy while you finish baking the second one. The result is perfectly golden layers every time. 🔥
Storage After Baking
Once cooled, slice the nut roll and store it in an airtight container at room temperature for up to 3 days. The layers stay crisp and the filling remains gooey. For longer storage, wrap individual slices in plastic wrap and freeze them for up to 2 months.
To reheat, warm slices in a 200°F oven for 5-10 minutes or microwave for 10-15 seconds until the filling is gooey again. 💫
Freezing Fully Baked Rolls
For maximum convenience, freeze the entire nut roll before slicing. Wrap it tightly in plastic wrap, then place it in a freezer bag with the air squeezed out. When ready to serve, thaw overnight in the fridge and slice as usual.
The texture remains just as good as fresh-baked, though the layers may be slightly softer after thawing. This method is ideal for meal prep—just slice and serve straight from the freezer when you're ready. ❄️
Nutrition facts
Frequently asked questions
Why does my nut roll dough turn out dense instead of flaky?
Overworking the dough or using warm butter melts the fat too quickly, preventing those signature layers. Always use cold cubed butter and handle the dough gently when rolling. The 30-minute chill before rolling is crucial—don't skip it!
Can I substitute walnuts for another nut in the filling?
Pecans or hazelnuts work beautifully—just toast them first for extra flavor. For a nut-free version, try crushed graham crackers or even a cream cheese mixture. The key is keeping the filling moist and flavorful.
How do I prevent the filling from leaking during baking?
Leave a 1-inch border around the dough edges when spreading the filling, and roll the dough tightly from the long side. Chilling the assembled roll overnight in the fridge helps the filling set better. If you're worried, brush the outside with extra melted butter before baking to seal it.
What's the best way to slice nut rolls for clean layers?
Use a sharp serrated knife and slice while the roll is still slightly warm (after 15 minutes of cooling). Dip the knife in hot water between cuts to prevent sticking. For extra clean slices, chill the roll for 30 minutes before cutting.
Can I make this nut roll gluten-free?
Yes, but you'll need a 1:1 gluten-free flour blend** and add 1 extra egg for binding. The texture won't be identical, but it'll still be delicious. For best results, use a blend with xanthan gum and chill the dough extra long (up to 2 hours).