Side Dishes
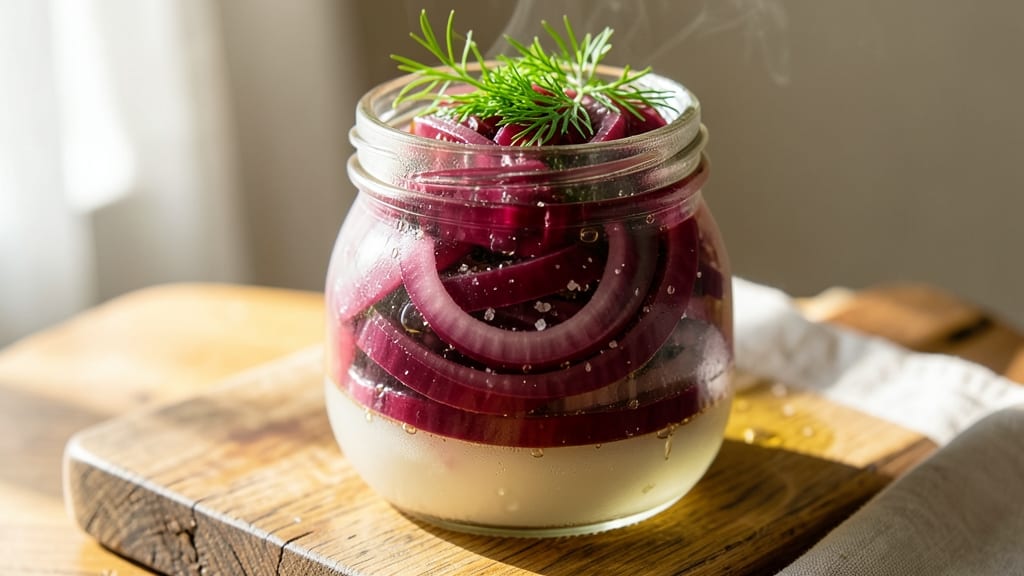
This lacto fermented red onions recipe turns humble onions into a vibrant, gut-loving condiment packed with tangy crunch and probiotic magic. The process is straightforward—just salt, time, and patience—but the results are extraordinary.
I’ve perfected this method over years of testing, ensuring every batch delivers vibrant color, sharp tang, and that signature fermented depth.
This recipe requires only 4 ingredients and 7 days of fermentation, making it accessible for beginners while delivering restaurant-quality flavor. The key lies in precise salt ratios and maintaining anaerobic conditions to preserve probiotics and prevent spoilage.
Once fermented, these onions become a versatile topping for tacos, salads, or sandwiches, adding a bright, complex flavor that elevates any dish.
The probiotic benefits alone make this recipe worth trying—each bite supports gut health while delivering a satisfying crunch. Unlike store-bought fermented foods, homemade versions retain maximum nutrients and flavor. With proper storage, your fermented onions will keep for months, ready to enhance meals whenever you need a tangy, probiotic boost.
Ready to transform red onions into a flavorful, health-boosting condiment? This method ensures success every time, whether you're a fermentation novice or a seasoned pro. Let’s get started with the foolproof steps that guarantee perfect results.
Ingredients for lacto fermented red onions
Four ingredients transform humble red onions into vibrant, probiotic-rich condiments perfect for tacos, salads, and sandwiches.
| Ingredient | Amount | Notes |
|---|---|---|
| Red Onions 🧅 | 2 lb | Organic preferred, no cuts or bruises |
| Non-Iodized Sea Salt 🧂 | 2 tbsp | Diamond Crystal preferred, fine grain |
| Filtered Water 💧 | 2 cups | Chlorine-free, room temperature |
| Fresh Dill Sprigs 🌿 | ¼ cup | Optional, for subtle flavor complexity |
The quality of your onions is non-negotiable. Organic red onions from Whole Foods Market or local farmers markets yield the best results due to their higher nutrient density and lack of synthetic preservatives. Avoid onions with any cuts or bruises, as these compromise the anaerobic environment needed for proper fermentation. For salt, Diamond Crystal kosher salt is ideal due to its fine grain and consistent mineral content—Morton's can work but may require slight adjustments. The water must be filtered and free of chlorine, as residual chlorine can inhibit fermentation. If you're unsure about your tap water, use bottled spring water.
No dill on hand? Fresh thyme or bay leaves work equally well for subtle flavor enhancement, though they impart slightly different aromatic profiles. For a more pronounced tang, increase salt by 0.5 tsp—this accelerates fermentation slightly but maintains safety. If you're short on time, reduce water by 0.25 cup to concentrate the brine, though this may slightly alter texture. For storage, glass fermentation crocks or airtight glass jars are essential—plastic can leach chemicals and compromise flavor. Always use a fermentation weight or a smaller jar to keep onions submerged.
Fermented onions reach peak flavor at 7-10 days but remain safe for up to 6 months when stored properly. Keep them in the refrigerator after opening, submerged in their brine. For long-term storage, transfer to sterilized glass jars with fresh brine—this preserves texture and probiotic activity. The flavor intensifies over time, making them perfect for gifting. When ready to use, drain and rinse briefly under cold water to remove excess brine, then pat dry. These onions elevate any dish where you'd use pickled onions, but their probiotic benefits make them uniquely valuable.
Why You'll Love This Recipe
- No Chopping Struggle: I swear by this method—just slice those onions thinly (no mandoline needed), pack them tight, and let the salt do the work. No peeling, no dicing battles, just straightforward layers and a weight to keep them submerged.
- Tangy Crunch Magic: That first bite? Sweet, sharp, and funky all at once, with the dill adding a bright herbal punch. Honestly, it’s the kind of flavor that makes you reach for more without even thinking.
- Pantry Powerhouse: A jar of these sits in my fridge like a secret weapon—toss them on burgers, mix into grain bowls, or dollop on sandwiches. They last weeks, so I’m always covered when I forget to buy fresh herbs.
- Cheap & Lasts Forever: Red onions are dirt cheap, and this recipe turns them into something special with almost no cost. I’ve had jars lingering for months, and the flavor only gets better with time—zero waste, all reward.
Step-by-step instructions for lacto-fermented red onions
Transform simple ingredients into gut-friendly, tangy onions through precise fermentation technique.
Prepare the Onions for Fermentation
Peel the 2 lb red onions carefully, leaving the root end intact to maintain structural integrity. Cut each onion into ¼-inch thick rings—this size ensures even fermentation while maximizing surface area for probiotic development. I use a sharp chef's knife for clean cuts, working on a cutting board to prevent bruising. Place the onion rings in a quart-sized glass jar, packing them tightly but not compressing them so hard that juice can't circulate.
Add the 0.25 cup fresh dill sprigs (if using) to the jar, distributing them evenly among the onions. The dill adds subtle complexity but isn't essential—this is purely optional. Leave about 1 inch of headspace at the top of the jar, as the onions will expand slightly during fermentation. This space prevents overflow when liquid forms.
Create the Brine Solution
In a separate bowl, dissolve the 2 tbsp non-iodized sea salt completely into the 2 cups filtered water using a whisk or spoon. The salt should fully dissolve before proceeding—undissolved crystals can create uneven fermentation. Pour this brine directly over the onions in the jar until they're completely submerged by at least 1 inch. Use a wooden spoon to gently press down the onions, ensuring no air pockets remain trapped.
This brine concentration (about 1.5% salt by weight) creates ideal conditions for lactobacilli to thrive while inhibiting harmful bacteria. The filtered water is crucial—chlorine can inhibit fermentation, and room temperature water ensures even dissolution of the salt.
Seal and Weight the Fermenting Onions
Place a fermentation weight or a smaller jar filled with water on top of the onions to keep them submerged. This prevents mold growth from exposure to air. Seal the jar with its lid, leaving it slightly ajar—about ¼ turn—to allow gases to escape during fermentation. The slight gap prevents pressure buildup while maintaining an anaerobic environment.
Store the jar at room temperature (between 68-72°F) in a dark place, such as a pantry or cupboard. Avoid direct sunlight, which can overheat the jar and create off-flavors. The onions will begin fermenting immediately, but visible changes appear within 24 hours—look for slight cloudiness in the brine and the formation of small bubbles.
Monitor and Taste Test During Fermentation
After 3 days, open the jar and check the onions. They should remain fully submerged, and you may notice a slight tang developing. Use a clean spoon to taste test one—you'll detect subtle sourness, but the flavor should still be primarily onion. If mold appears (fuzzy spots), discard the batch immediately as it indicates contamination.
Continue fermenting for a total of 7 days, opening the jar daily to release accumulated gases. The onions will become progressively tangier and develop a vibrant pinkish hue. After 7 days, they should have a bright, crisp texture and a balanced tangy-sweet flavor. The brine may develop a cloudy appearance, which is normal and indicates active fermentation.
Store and Enjoy Your Fermented Onions
Once fermented to your preferred tang level, transfer the onions to a clean, airtight container. They'll continue fermenting slowly in the refrigerator, so the flavor will deepen over time. The onions will keep for 3-6 months in the fridge, with peak flavor typically at 2-3 weeks of refrigerated storage.
Use these probiotic-rich onions in sandwiches, salads, or as a tangy topping for tacos and bowls. The fermentation process enhances their natural sweetness while adding beneficial bacteria to your diet. For best results, consume within 6 months for optimal texture and probiotic potency.
Pro Tips For Making Lacto Fermented Red Onions
- Pack Onions Tight: Use a clean jar or container and press the sliced onions down firmly—no air gaps. I learned this the hard way when my first batch had mold creeping in from the top; proper packing keeps everything submerged and happy.
- Salt in Layers: Alternate onion slices with salt between each layer, not just a sprinkle on top. This guarantees even flavor distribution and prevents clumping—no one wants a salty top and bland bottom.
- Burp the Jar Daily: Open and close the lid every 24 hours to release built-up gas. I skipped this once and ended up with a jar that looked like a soda bottle ready to explode—messy, but avoidable.
- Use Cold Water: Dissolve the salt in cold filtered water before adding it to the jar. Warm water speeds up fermentation too fast, leading to a sour, off-flavor. Cold keeps things balanced—trust the process.
Pro cooking tips for lacto fermented red onions
Salt Ratio Precision
The 2 tbsp non-iodized sea salt in 2 cups water creates a 1.5% brine—this exact ratio is critical for safety and flavor. I weigh my salt using a digital kitchen scale (like the OXO Good Grips) to ensure accuracy, as volume measurements can vary.
Too little salt risks spoilage, while too much inhibits beneficial bacteria. For 1 lb onions, reduce salt to 1 tbsp and water to 1 cup to maintain the same ratio. 🧂
Onion Slice Uniformity
Cutting onions into ¼-inch rings ensures even fermentation—thicker slices ferment unevenly while thinner ones lose texture. I use a mandoline slicer (like the Benriner) for perfect consistency, but a sharp chef's knife works too.
Leave the root end intact to maintain structural integrity during fermentation. For extra crunch, add ¼ tsp black peppercorns to the jar before brining—this enhances texture while adding subtle warmth. ⚡
Anaerobic Environment
Submerging onions by 1 inch prevents mold by eliminating oxygen exposure. I use a fermentation weight (like the Kanz brand) or a water-filled jar to keep onions down. If using a regular jar, leave the lid ¼ turn open to release CO2 buildup—this prevents pressure explosions.
Store in a dark pantry (68-72°F) for consistent fermentation. Never use metal weights—they can react with acids and spoil the batch. 🌡️
Daily Gas Release
Opening the jar daily for 10-15 seconds releases trapped gases and prevents pressure buildup. I use a clean wooden spoon to press onions down after each release to maintain submersion. This simple step prevents mold and ensures even fermentation.
After 3 days, you'll notice bubbles forming—this confirms active fermentation. If you smell a strong vinegar odor, reduce fermentation time slightly next batch. 💫
Taste Testing Protocol
Test flavor at 3 days and 7 days using a sterilized spoon. At 3 days, you'll detect subtle tang; at 7 days, the sweetness should balance with sharpness. If the flavor is too sour, refrigerate immediately to slow fermentation.
For milder onions, ferment for only 5 days. I keep a food journal to track flavor development across batches—this helps me adjust timing for future ferments. ✨
Storage Transition
After 7 days, transfer onions to a sterilized glass container with fresh brine (if storing long-term). Refrigeration slows fermentation but doesn't stop it—flavor continues developing over 6 months. For immediate use, drain and rinse briefly under cold water to remove excess brine.
Store in an airtight container with 1 inch of brine above the onions to preserve texture. The probiotic benefits peak at 2-3 weeks of refrigerated storage. 💪
Nutrition facts
Frequently asked questions
Can I use regular table salt instead of non-iodized sea salt?
No, regular iodized table salt contains anti-caking agents that can inhibit fermentation. Use only non-iodized sea salt or kosher salt—iodine and additives interfere with the beneficial bacteria needed for proper fermentation. Diamond Crystal brand is ideal for consistent results.
How do I know when my fermented onions are ready?
Your onions are ready when they develop a bright pinkish hue and a balanced tangy-sweet flavor, typically after 7 days. Test at 3 days for subtle tang, then again at 7 days for full flavor. If they taste too sharp, refrigerate immediately to slow fermentation.
What should I do if mold appears on my fermented onions?
If you see fuzzy spots (mold), discard the entire batch immediately—it indicates contamination. To prevent this, always keep onions fully submerged by 1 inch using a fermentation weight, and store in a dark, cool place (68-72°F). Never use metal weights, as they can react with acids.
Can I ferment red onions without dill?
Dill is optional and adds subtle complexity, but fermented red onions taste delicious without it. For extra flavor, try adding ¼ tsp black peppercorns or a few fresh thyme sprigs instead. The key is maintaining the proper salt-to-water ratio for safety and flavor.
How long will fermented red onions keep in the fridge?
Properly stored, they’ll stay fresh for 3-6 months in the refrigerator. Flavor continues developing over time, so they taste even better after 2-3 weeks1 inch of brine above the onions to preserve texture and probiotics.