Main Courses
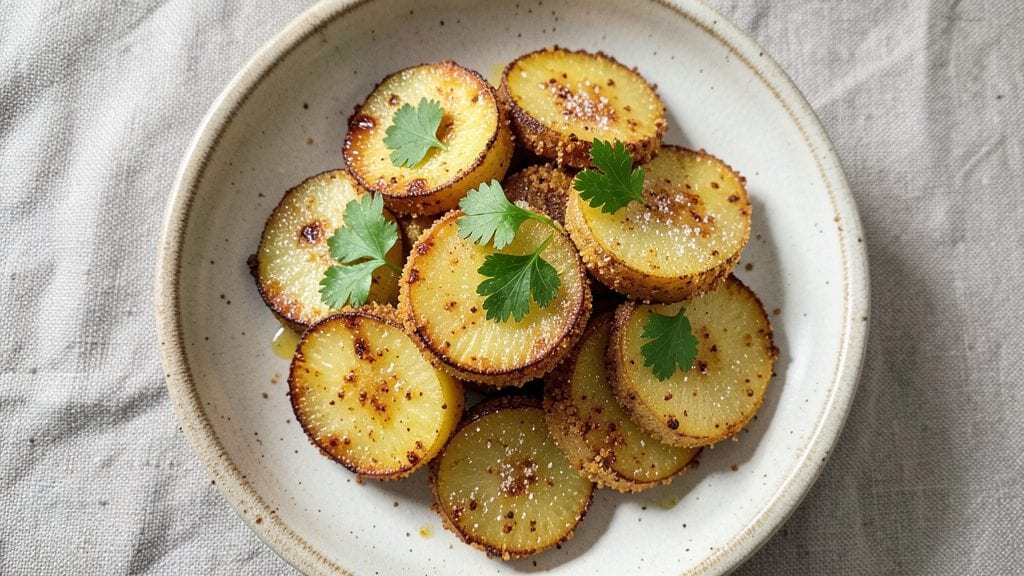
This fried turnips recipe transforms humble root vegetables into a crispy, golden side dish with a sweet vinegar zing that elevates any meal. The secret lies in the cornmeal coating, which creates an irresistible crunch while the vinegar glaze adds a tangy brightness that cuts through rich flavors.
I developed this method after discovering how well turnips absorb seasonings and hold their shape during frying, making them perfect for both hearty dinners and light salads.
What sets this recipe apart is its versatility—pan-fried for quick weeknight meals or air-fried for a lighter option, these turnips deliver the same satisfying crunch every time. The process is straightforward: slice the turnips uniformly, coat them in a seasoned cornmeal mixture, and fry until golden brown.
This method ensures a crispy exterior while keeping the interior tender, and the sweet vinegar glaze ties everything together with a perfect balance of sweetness and acidity.
The result is a dish that's crispy enough to stand alone as a snack but substantial enough to serve as a side or salad topping.
The cornmeal coating adds a satisfying texture, while the vinegar glaze brings a refreshing zing that pairs beautifully with grilled meats, roasted vegetables, or even as a topping for grain bowls.
Whether you're serving a family dinner or prepping for meal prep, these fried turnips will bring a restaurant-quality crunch to your table.
For those looking to modernize the dish, swap the cornmeal for gluten-free flour or almond meal, and use avocado oil for a lighter fry. The recipe also scales effortlessly—double the batch for game day or potlucks. Here’s how to make them perfectly crispy every time.
Ingredients for fried turnips
Transform humble turnips into crispy, golden bites with this sweet vinegar zing recipe.
| Ingredient | Amount | Notes |
|---|---|---|
| Yellow Turnips 🥕 | 2 lb | Uniformly sliced into 1/4-inch pieces |
| Fine Cornmeal 🌾 | 1 cup | White or yellow preferred |
| All-Purpose Flour 🌾 | ½ cup | For extra crispiness |
| Vegetable Oil 🫒 | 2 cups | High smoke point preferred |
| White Vinegar 🍶 | ½ cup | For sweet vinegar glaze |
| Granulated Sugar 🍚 | ¼ cup | For glaze sweetness |
| Salt 🧂 | 1 ½ tsp | Kosher or sea salt |
| Black Pepper 🌶️ | ½ tsp | Freshly ground preferred |
| Garlic Powder 🧄 | 1 tsp | For seasoning coating |
| Dried Parsley 🌿 | 1 tsp | For garnish |
| Lemon Juice 🍋 | 1 tbsp | Freshly squeezed |
The turnips are the star here—firm, yellow varieties like 'Golden Globe' hold their shape best during frying. Most grocery stores carry them in the produce section, often near potatoes. Look for smooth, unblemished roots with vibrant color, as these indicate freshness and better texture. If you can't find yellow turnips, purple turnips work too, though they'll impart a slight earthy flavor. For the cornmeal, Bob's Red Mill or King Arthur brands are reliable choices, offering fine grind that coats evenly. The vegetable oil matters too—avocado or peanut oil have high smoke points perfect for frying, while lighter oils like canola can burn more easily.
No cornmeal? Gluten-free flour or almond meal works beautifully—just add an extra tablespoon of flour to help bind the coating. Short on white vinegar? Apple cider vinegar gives a slightly sweeter, fruitier glaze, though it may darken faster. For a sugar substitute, maple syrup or agave can replace the granulated sugar at a 1:1 ratio, though the texture may vary slightly. The lemon juice is optional but adds a bright finish—skip it if you prefer pure vinegar tang. For extra crispiness, double the flour in the coating, but don't overcrowd the pan when frying. If you're air-frying, spray the basket with oil** and shake the turnips halfway through for even cooking.
Store leftover fried turnips in an airtight container for up to 3 days, though they're best enjoyed fresh. Reheat in a 350°F oven for 5-7 minutes to restore crispiness, or air-fry for 2-3 minutes. For meal prep, portion into single servings before reheating to maintain texture. The vinegar glaze can be made ahead—store separately and toss with the turnips just before serving. These keep well frozen for up to 2 months if you're planning ahead, though texture may soften slightly upon thawing.
Why You'll Love This Recipe
- Crispy in Minutes: The turnips hit the oil at 375°F—just long enough for that golden crust to form while staying tender inside. No waiting around; I’m talking 12 minutes max from raw to sizzling.
- Vinegar Kiss: That splash of white vinegar in the batter? Magic. It cuts through the richness of the cornmeal crust, leaving a bright, almost tangy finish that makes every bite feel fresh—like a little surprise in every crunch.
- Budget Crowd-Pleaser: Turnips cost next to nothing, and this recipe stretches to feed four (or more if you’re feeding teenagers). Honestly, my grocery bill thanks me every time I make it.
- Leftovers? No Problem: They reheat like a dream—crispy again in the air fryer for 3-4 minutes. I’ll be real: I’ve eaten them cold straight from the fridge, and they’re still solid. (Yes, even on a Tuesday night.)
Step-by-step instructions for crispy cornmeal-crusted turnips
Master this technique and you'll achieve turnips with a perfect crunchy exterior and tender interior every time.
Prepare the Turnip Slices for Even Cooking
Peel the 2 lb yellow turnips and slice them uniformly into ¼-inch pieces using a sharp mandoline or chef's knife. The uniformity is key—this ensures even cooking and consistent crispiness throughout. Place the sliced turnips in a large bowl and toss them gently with the 1 tbsp lemon juice. This acidity helps tenderize the turnips slightly while preventing browning during prep.
Let the turnips sit for 10 minutes while you prepare the coating. This brief marinade also enhances their natural sweetness, which pairs beautifully with the sweet vinegar glaze we'll make later. Drain any excess lemon juice before proceeding—you want the turnips to be damp but not wet when they hit the coating.
Create the Crispy Cornmeal Coating
In a separate large bowl, whisk together the 1 cup fine cornmeal, 0.5 cup all-purpose flour, 1.5 tsp salt, 0.5 tsp black pepper, and 1 tsp garlic powder. The cornmeal provides that signature crunch while the flour helps bind the coating to the turnips. I like to use a whisk here to break up any cornmeal lumps and ensure an even distribution of seasoning.
Add the drained turnips to the dry mixture and toss gently but thoroughly until every slice is completely coated. You'll want to work quickly—turnips absorb moisture rapidly, which can make the coating gummy. If the turnips seem too dry after tossing, add 1 tsp of cold water to the mixture and toss again. The coating should cling evenly without falling apart when you lift a handful.
Fry Until Golden Brown and Crispy
Heat the 2 cups vegetable oil in a deep skillet or Dutch oven over medium heat until it reaches 350°F on a deep-fry thermometer. The oil should be hot enough to create gentle bubbles around the turnips when they're added, but not so hot that it smokes excessively. This temperature ensures a crispy exterior without burning the coating.
Working in batches to avoid overcrowding, carefully add the coated turnips to the hot oil. Fry for 4-5 minutes, turning occasionally with tongs, until the turnips are golden brown and the coating is crispy. Remove the turnips with a slotted spoon and drain on a wire rack set over a baking sheet lined with paper towels. This rack allows air to circulate underneath, preventing sogginess. The turnips should stay crispy as they cool.
Make the Sweet Vinegar Glaze
In a small saucepan, combine the 0.5 cup white vinegar and 0.25 cup granulated sugar. Bring to a gentle simmer over medium heat and cook for 3-4 minutes, stirring occasionally, until the sugar dissolves completely and the mixture thickens slightly. You're looking for a glossy, syrupy consistency that will cling beautifully to the crispy turnips.
Remove from heat and stir in the 1 tsp dried parsley. Let the glaze cool for 2 minutes before drizzling it over the hot turnips. The contrast between the crispy cornmeal coating and the tangy-sweet glaze creates a perfect balance of textures and flavors. The glaze should coat the turnips evenly without making them soggy—if it's too thick, add 1 tsp water to loosen it slightly.
Serve Immediately for Maximum Crunch
Transfer the glazed turnips to a serving platter and serve immediately while they're still crispy. The turnips should have a deep golden brown color with a satisfying crunch that gives way to tender, slightly sweet turnip when you bite in. If you need to hold them for more than 5 minutes before serving, tent loosely with foil to preserve the crispiness.
These turnips make an excellent side dish for grilled meats, fried chicken, or even as a vegetarian main with a simple salad. The combination of crispy cornmeal coating and sweet vinegar glaze transforms ordinary turnips into a restaurant-worthy dish that's sure to impress your guests. The key to success lies in maintaining the crispiness throughout the process—hot oil, proper draining, and serving immediately are non-negotiable steps.
Pro Tips For Making Fried Turnips
- DON’T SKIP THE SOAK: I learned this the hard way—raw turnips release water like a sponge when fried, and that’s the fast track to soggy crusts. Toss peeled wedges in cold water for 10 minutes, then drain thoroughly before dredging. The extra step guarantees a crispy exterior instead of a sad, limp coating.
- USE A THICK BATTER SLURRY: Thin batter means weak crusts. Mix your flour and cornmeal with just enough cold water to form a thick paste—like pancake batter consistency. Too runny? Add a splash more flour. The goal is a sticky but moldable coating that clings without dripping.
- FRIED IN BATCHES, NOT CROWDS: After burning three batches, I finally figured out: turnips need space. Fry 2-3 pieces at a time in 350°F oil, or they’ll steam instead of sear. Overcrowding drops the oil temp fast, and you end up with greasy, unevenly cooked wedges. Patience here makes all the difference.
- TOSSED IN VINEGAR AFTER FRIED: Sounds weird, but it works: while the turnips are still hot, toss them in a mix of 1 tablespoon white vinegar and 2 tablespoons oil. The acid cuts through the richness and brightens the turnips’ natural sweetness—like a quick pickle bath. Do it right after frying, or they’ll taste flat.
Make-ahead tips for this recipe
Prep Ahead Components
Start by prepping the turnip slices up to 24 hours ahead—store them in an airtight container with a sprinkle of salt to maintain texture.
I like to keep them in the fridge, but if prepping more than a day ahead, toss them with 1 tbsp lemon juice to prevent browning.
The coating and glaze can also be made separately: mix the cornmeal, flour, and spices in advance, and prepare the vinegar glaze up to 3 days ahead—just reheat it gently before drizzling.
Batch Cooking Tips
Double the recipe for game day or potlucks by using a large Dutch oven or deep fryer. Work in batches of 1 cup turnips at a time to maintain oil temperature and crispiness.
Keep the cooked turnips warm in a 200°F oven on a wire rack while you finish frying the remaining batches. This method ensures every batch stays crispy and ready to glaze.
Freezer-Friendly Method
For ultimate convenience, fry the turnips completely and freeze them un glazed on a parchment-lined tray for 1 hour to set the coating. Transfer to a freezer bag and store for up to 2 months.
When ready to serve, reheat in a 400°F oven for 8-10 minutes or air-fry for 3-4 minutes, then toss with freshly made glaze. The coating stays crispy even after freezing!
Glaze Prep Shortcut
Make the vinegar glaze the night before and store it in a small jar in the fridge. When ready to serve, simply reheat it in a saucepan over medium heat for 2-3 minutes until warm and glossy.
This saves time on busy weeknights while keeping the glaze's signature tangy-sweet flavor. Just avoid reheating it too long—you want it syrupy, not reduced to a paste.
Reheating for Crispiness
If reheating leftovers, the air fryer is your best friend. Toss the turnips in a single layer and air-fry at 375°F for 3-4 minutes until crispy again. For stovetop reheating, use a nonstick skillet over medium heat for 2-3 minutes per side—just enough to restore the crunch without overcooking.
Avoid microwaving, as it turns the coating soggy.
Meal Prep Serving Ideas
Portion the fried turnips into single-serving containers with a small side of glaze. Pair them with prepped proteins like grilled chicken or roasted veggies for balanced meals. For salads, store the turnips separately and add them fresh to avoid sogginess.
The glaze can also be drizzled over grain bowls or tacos for a crispy, tangy topping that elevates any dish. 💫
Nutrition facts
Frequently asked questions
Can I use purple turnips instead of yellow?
Purple turnips work beautifully and add a subtle earthy flavor. The color won't affect the crispiness, but the flesh may have a slightly different texture. Just peel and slice them the same way as yellow turnips for consistent results.
How do I keep the coating from falling off?
Work quickly when coating the turnips—they absorb moisture fast. Use cold water (just 1 tsp) if needed to help the cornmeal mixture stick. Also, don't overcrowd the pan during frying, which can cause steam and make the coating loosen.
Can I make this recipe without deep frying?
Yes! For a lighter version, try air-frying at 375°F for 12-15 minutes (shake halfway). Or pan-fry in 1/4-inch oil over medium heat for 6-8 minutes per side, turning carefully. The texture will be slightly less crispy but still delicious.
What's the best way to store leftovers?
Keep them crispy by storing in an airtight container for up to 3 days. Reheat in a 375°F oven for 5 minutes or air-fry for 3-4 minutes. Never microwave—it ruins the crunch! For longer storage, freeze unglazed turnips for up to 2 months.
Can I use this recipe for other root vegetables?
While turnips work best, you can try it with parsnips or rutabagas for similar results. Just adjust cooking time—root veggies with denser textures may need 1-2 extra minutes** of frying. The cornmeal coating works well on most firm vegetables!