
Side Dishes
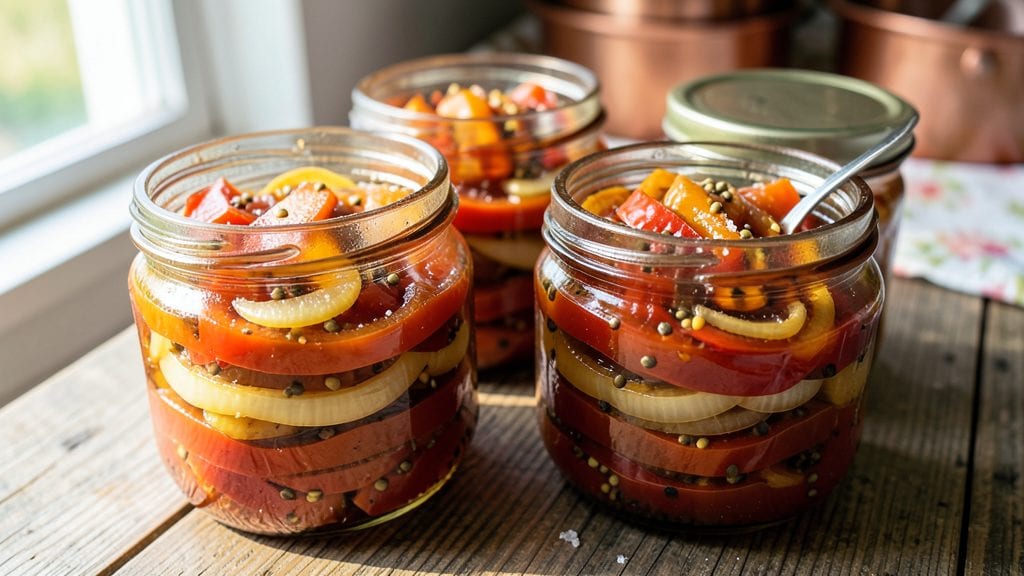
This canned sweet pepper relish recipe transforms garden-fresh peppers into a sweet-tangy condiment that adds crunch and brightness to sandwiches, hot dogs, and more. The traditional method preserves peppers in vinegar and sugar, creating a balance of sweetness and acidity that keeps for months.
I’ve perfected this recipe through years of testing, ensuring the texture stays chunky and vibrant while maintaining food safety standards for home canning.
The process begins with sterilizing jars and lids to prevent spoilage, then simmering peppers, onions, and spices in a flavorful vinegar-sugar mixture until tender.
This method locks in freshness while developing a complex taste that’s both nostalgic and modern—think classic relish with optional twists like diced apples or a pinch of cayenne for heat. The result is a condiment that’s versatile enough for everyday meals but special enough for holiday tables.
What sets this recipe apart is its reliability: every batch delivers a consistent texture and flavor, whether you’re canning a small batch for personal use or scaling up for gifts. The sweet-tangy crunch pairs perfectly with grilled meats, cheese boards, or even as a topping for deviled eggs.
With proper storage, these jars stay fresh for up to a year, making this a pantry staple worth the effort.
For those new to canning, I’ve included step-by-step guidance on sterilization and sealing to ensure safety and success. Whether you stick to the classic version or experiment with fruit or herbs, this relish is a game-changer for adding fresh, homemade flavor to any dish.
Let’s get started on preserving that summer harvest!
Ingredients for canned sweet pepper relish
Sweet peppers, vinegar, and sugar transform into a crunchy condiment perfect for sandwiches and more.
| Ingredient | Amount | Notes |
|---|---|---|
| Fresh Sweet Peppers 🍆 | 4 cups | Diced, any sweet variety |
| Yellow Onions 🧅 | 1 medium | Diced, about 1 cup |
| White Vinegar 💧 | 3 cups | 5% acidity minimum |
| Granulated Sugar 🍚 | 2 ½ cups | White or raw |
| Salt 🧂 | 1 ½ tsp | Non-iodized preferred |
| Mustard Seeds 🌶️ | 1 tsp | Whole, yellow preferred |
| Ground Cloves 🌿 | ½ tsp | Freshly ground preferred |
| Canning Salt 🧂 | 1 tsp | Diamond Crystal preferred |
| Canning Jars 🥫 | 4 pieces | Pint-sized, new lids required |
| Lemon Juice 🍋 | 1 tbsp | Freshly squeezed |
The quality of your peppers and vinegar makes all the difference. Heirloom sweet peppers from a farmers market add depth, but grocery store varieties work fine. For vinegar, white vinegar with at least 5% acidity is essential for safe canning—Heinz or Texas Pete are reliable brands. The sugar should be white granulated for consistent texture, though raw sugar works if you prefer a deeper flavor. Mustard seeds and cloves are non-negotiable for that classic relish taste, but if you're short on cloves, allspice berries work in a pinch.
No pint jars? Quart jars with half the recipe work just as well. Running low on vinegar? Apple cider vinegar gives a slightly fruity twist, though it's less traditional. The lemon juice is optional but adds a bright finish—skip it if you prefer pure sweet-tangy flavor. For texture, you can add diced apples or celery if you want extra crunch. Just ensure your vinegar and lemon juice together total at least 3 cups of liquid for proper preservation.
This relish keeps for up to a year in a cool, dark pantry. Once opened, transfer to the fridge and use within 3 months. The jars are perfect for gifting—just attach a handwritten note. For best results, sterilize jars and lids in boiling water for 10 minutes before filling. The relish thickens as it sits, so don't be alarmed if it looks syrupy after canning—it's supposed to be that way.
Why You'll Love This Recipe
- No-Chop Shortcut: The sweet peppers and onions slice in seconds—no dicing, no fuss. I just grab a knife, make quick slashes, and toss them straight into the pot. That’s it. (Between us, my cutting board stays cleaner than my kitchen floor.)
- Sweet-Tangy Magic: That balance of bright vinegar and caramelized sugar? It’s addictive. The peppers stay crisp while the onions melt into a jammy sweetness—like a cross between salsa and jam, but better. Honestly, I’ve caught myself sneaking spoonfuls straight from the jar.
- BBQ’s Secret Weapon: Slather it on burgers, drizzle it over pulled pork, or stir it into deviled eggs. It’s the one relish that makes everything taste like a Sunday dinner. My kids beg for it at picnics, and my husband keeps a jar in his work bag for sandwiches. (Yes, even on a Tuesday night.)
- Pantry Goldmine: A single batch lasts months—perfect for gifting or stashing for holidays. The vinegar and sugar preserve it beautifully, and I’ve never had it spoil. Plus, you’re using up those sad half-rotten peppers in your crisper drawer before they go bad. Win-win.
Step-by-step instructions for canned sweet pepper relish
This method delivers a perfectly balanced relish with crisp texture and vibrant flavor—ready for canning.
Prepare and Sterilize Canning Equipment
Begin by washing the 4 pieces canning jars and new lids in hot, soapy water. Place them in a large pot and cover with water. Bring to a boil for 10 minutes to sterilize completely. Keep them hot until ready to fill. This step prevents contamination and ensures shelf stability.
While the jars sterilize, prepare a water bath canner by filling it with 3 inches of water. Place a rack in the bottom to keep jars elevated. This setup allows for even heat distribution during processing. Keep the canner off the heat until you're ready to begin canning.
Cook the Sweet Pepper and Onion Base
In a large, heavy-bottomed pot, combine the 4 cups fresh sweet peppers and 1 medium yellow onions (previously diced). Cook over medium-high heat for 8-10 minutes until the vegetables soften and begin to release moisture. Stir occasionally to prevent sticking.
You'll know the vegetables are ready when they collapse slightly and the edges turn translucent. This cooking step removes excess water and develops the base flavor. Avoid overcooking—they should remain slightly crisp rather than mushy.
Add Vinegar, Sugar, and Seasonings
Remove the pot from heat and stir in the 3 cups white vinegar, 2.5 cups granulated sugar, 1.5 teaspoons salt, 1 teaspoon mustard seeds, 0.5 teaspoon ground cloves, and 1 tablespoon lemon juice. Mix thoroughly until all ingredients are fully incorporated and the sugar dissolves completely.
Return the mixture to medium heat and bring to a gentle boil, stirring constantly. Once boiling, reduce heat to medium-low and simmer for 15 minutes, stirring every 5 minutes. This simmering process ensures proper sugar dissolution and flavor blending. The relish should thicken slightly but remain spoonable.
Fill Jars and Process for Shelf Stability
Using a ladle, carefully fill each hot, sterilized canning jar with the relish mixture, leaving ½-inch headspace at the top. Remove air bubbles by gently tapping the jar on the counter or using a bubble-free tool. Wipe the jar rims with a clean, damp cloth to ensure a proper seal.
Place the lids on the jars and screw on the bands until fingertip-tight. Lower the jars into the boiling water bath canner, ensuring they're fully submerged. Process for 15 minutes at a rolling boil. This processing time creates a vacuum seal that preserves the relish for months.
Cool and Store the Relish
Remove the jars from the canner using tongs and place them on a clean towel. Let them cool undisturbed for 12 hours to ensure the lids seal completely. Check that the lids have sealed by pressing down—they shouldn't pop back up. This cooling period allows the jars to properly seal and prevents contamination.
Once fully cooled, store the sealed jars in a cool, dark place. This relish will keep for up to 1 year unopened. The flavor will continue to develop over time, making it perfect for holiday gifts or pantry staples. The sweet-tangy balance makes it ideal for sandwiches, charcuterie boards, or as a topping for grilled meats.
Pro Tips For Making Canned Sweet Pepper Relish
- Chop Peppers Small: DESCRIPTION: You’re not making a stir-fry—aim for pea-sized pieces. I used to cut them into big chunks, and the texture was all wrong. Tiny pieces soften evenly and blend into the relish without any weird bite. A sharp knife and a steady hand make this faster than you’d think.
- Sweat Onions Low: DESCRIPTION: Don’t rush the onions—they’re the flavor base. Cook them over medium-low heat for 8–10 minutes until translucent and just starting to caramelize. High heat burns them, and you’ll taste it in every jar. Patience here saves you from regret later.
- Simmer Until Syrupy: DESCRIPTION: The relish needs to thicken enough to coat the back of a spoon. If it’s still watery after 20 minutes of simmering, reduce the heat and let it bubble gently. Rushing this step means a runny relish that won’t keep well—no one wants to open a jar and get soup.
- Sterilize Jars Hot: DESCRIPTION: Skip the dishwasher’s sanitize cycle—it’s not enough. Fill jars and lids with boiling water for 10 minutes, then drain. Cold jars can cause seals to fail, and that’s how you end up with spoiled relish. Do this while the relish cooks; it’s not extra work, it’s non-negotiable.
Perfect pairings for this dish
Classic Sandwich Spread
This relish shines on classic American sandwiches like Reuben or pastrami on rye. The sweet-tangy crunch cuts through rich meats and creamy sauces beautifully. I spread about 1 tablespoon per sandwich alongside mustard or mayo. For a gourmet twist, add a dollop of whipped goat cheese alongside it. 🥪
Grilled Meat Topper
Use this relish as a finishing touch for grilled chicken, pork chops, or steak. Spoon it over the meat in the last minute of grilling so it caramelizes slightly.
The acidity in the vinegar helps tenderize the meat while adding vibrant color. I especially love it on grilled pork tenderloin with a honey glaze. 🔥
Cheese Board Essential
Create a showstopping cheese board by arranging aged cheddar, gouda, and brie alongside this relish. The sweetness balances sharp cheeses, while the crunch provides texture contrast.
I pair it with apple slices, walnuts, and crackers for a well-rounded spread. For extra flair, add a drizzle of honey alongside the relish. 🧀
Hot Dog & Burger Boost
Elevate your hot dogs or burgers by adding a spoonful of this relish on top. The chunky texture and bright flavors make it a perfect alternative to ketchup.
I like to pair it with caramelized onions and sauerkraut for a German-inspired twist. For burgers, add it alongside caramelized onions and American cheese. 🌭
Deviled Egg Upgrade
Take deviled eggs to the next level by mixing 1 teaspoon of relish into each yolk mixture. The sweet-tangy flavor adds complexity that complements the creamy filling. Garnish with paprika and chopped chives for a pop of color. This version is especially popular at summer picnics. 🥚
Cocktail Garnish
Add a unique twist to cocktails by using this relish as a garnish. Spoon a small amount onto the rim of a gin and tonic or whiskey sour for a sweet-tangy contrast.
The crunchy texture adds an unexpected element to sipping cocktails. For a festive touch, serve it in small bowls alongside the drinks. 🍹
Nutrition facts
Frequently asked questions
Can I substitute white vinegar with apple cider vinegar?
Yes, you can use apple cider vinegar, but the flavor will be slightly fruitier and less sharp. For a traditional taste, stick with white vinegar, but if you prefer a milder acidity, apple cider works well. Just ensure it has at least 5% acidity for safe canning.
How do I know if my jars are properly sealed?
After cooling for 12 hours, press the center of the lid—if it doesn’t pop back up, the jar is sealed. Listen for a satisfying "ping" sound when you tap the lid with a spoon; this confirms a vacuum seal. Unsealed jars should be refrigerated and used within 1 week.
Can I add other vegetables or fruits to this relish?
Try adding diced apples, celery, or even jalapeños for extra crunch or heat. Just ensure the total liquid (vinegar + lemon juice) remains at least 3 cups to maintain proper preservation. Adjust sugar to taste if adding sweeter ingredients like apples.
Why does my relish look too watery after canning?
This is normal—the relish thickens as it cools and settles. If it’s extremely thin, simmer it uncovered for 5-10 minutes to reduce excess liquid. Avoid over-simmering, as it can make the peppers mushy. The texture should be chunky but spoonable.
How long can I store opened jars of relish?
Once opened, transfer the relish to an airtight container and refrigerate. It’ll stay fresh for up to 3 months. For longer storage, freeze it in small portions for up to 6 months. The flavor may mellow slightly over time, but it remains safe to eat.